Toggle an object (using manual animations)
In this tutorial, we'll create a simple prefab that makes a cube appear and disappear. We'll also attach it to the avatar's hand, so it's easy to see.
Step 1: Creating our objects
We'll start by creating the GameObjects we'll be showing. Start by dropping a test avatar in the scene,
and adding an empty GameObject to be the base of your prefab (we'll call this ToggleDemo). Inside this GameObject,
create a HandRef object
which we'll use to track the hand, and put the cube we want to display inside of that object.
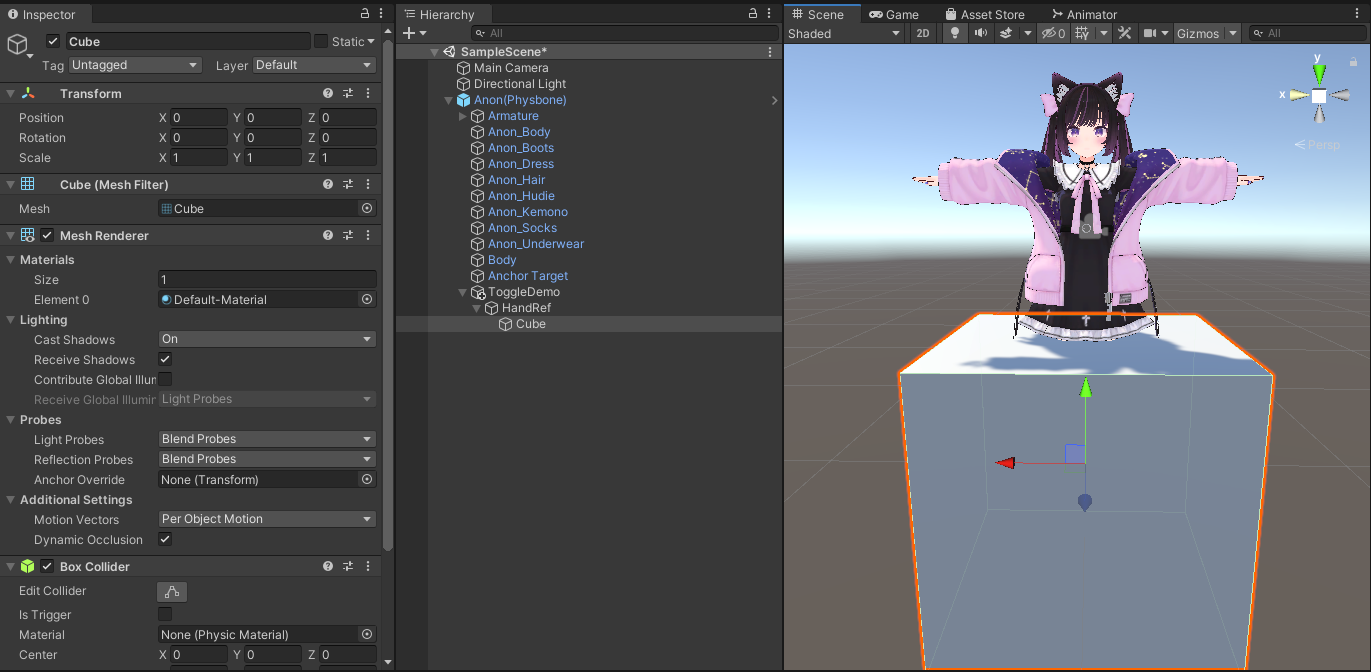
Attach the cube to your hand
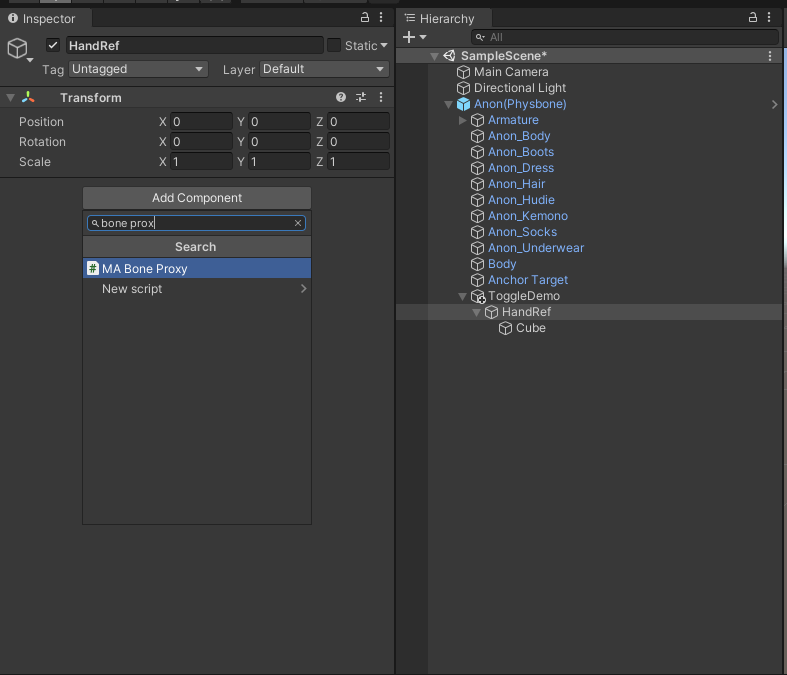
Next, let's have the HandRef track the avatar's right hand. Select the HandRef object, and click Add Component in
the inspector.
Add a MA Bone Proxy.
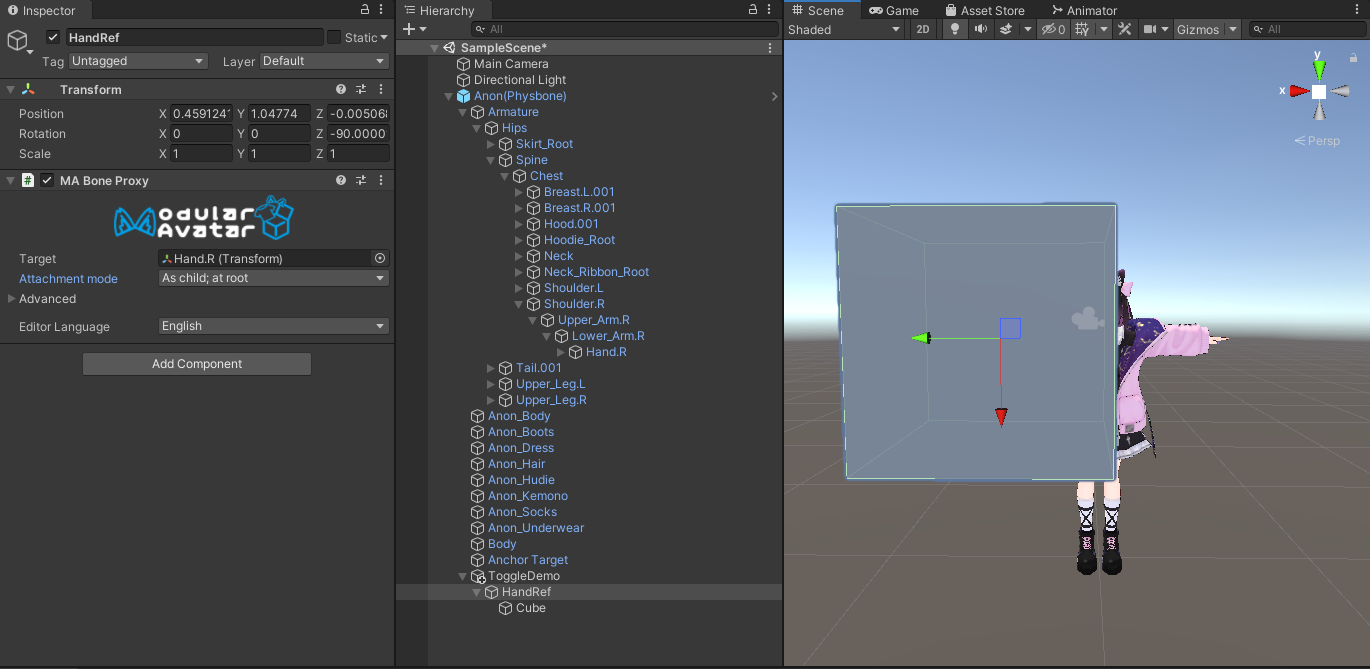
Drag-and-drop the avatar's right hand bone into the "Target" field. Set "Attachment Mode" to "As child; at root". The cube will immediately snap to the avatar's hand. Adjust its scale and position until it's not quite so in the way. Don't forget to remove the Box Collider from the Cube as well!
Step 2: Creating our animator controller
Next, we'll create an animator controller that will control the cube's visibility.
Create a new Animator Controller, and two animation clips (we'll call them CubeOff and CubeOn). Open the Animator
Controller, and drag the two clips in.
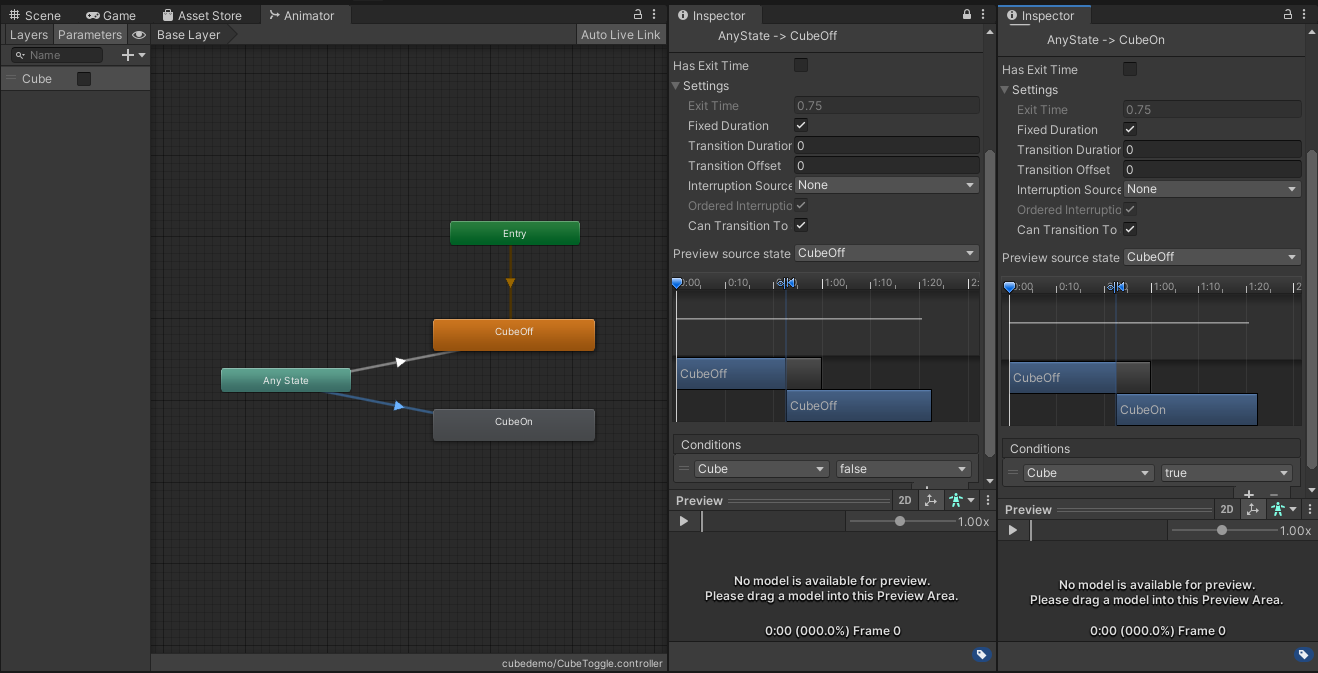
Then right click Any State and choose add transition to connect it to CubeOff. Do the same for CubeOn.
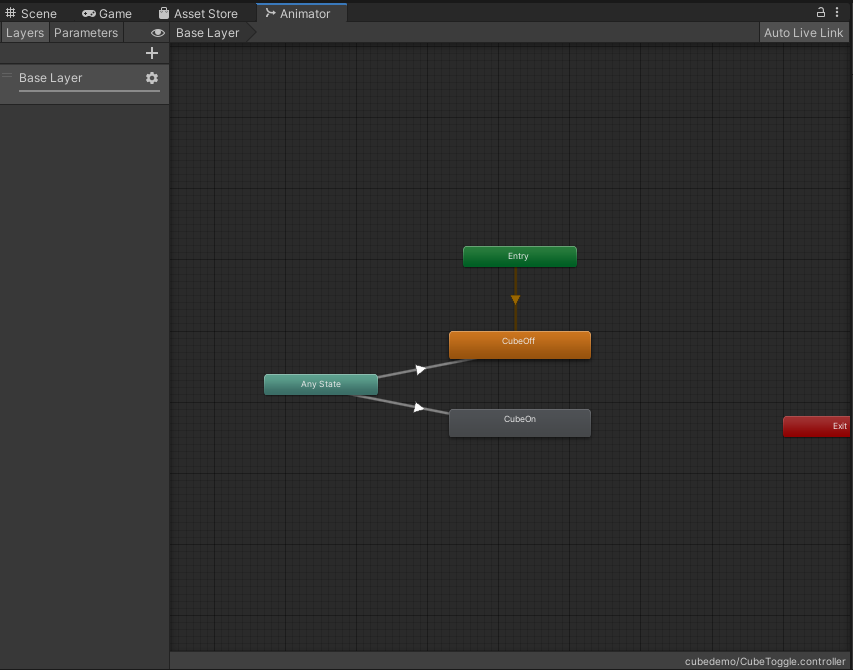
Setting up transitions
Create a new bool parameter called Cube. Then, for each of your transitions, set Transition Duration to be 0, and Can
Transition to Self off.
Add our Cube parameter to the conditions, and for the CubeOff transition set it to false.
Step 3: Merge Animator, and recording our animations
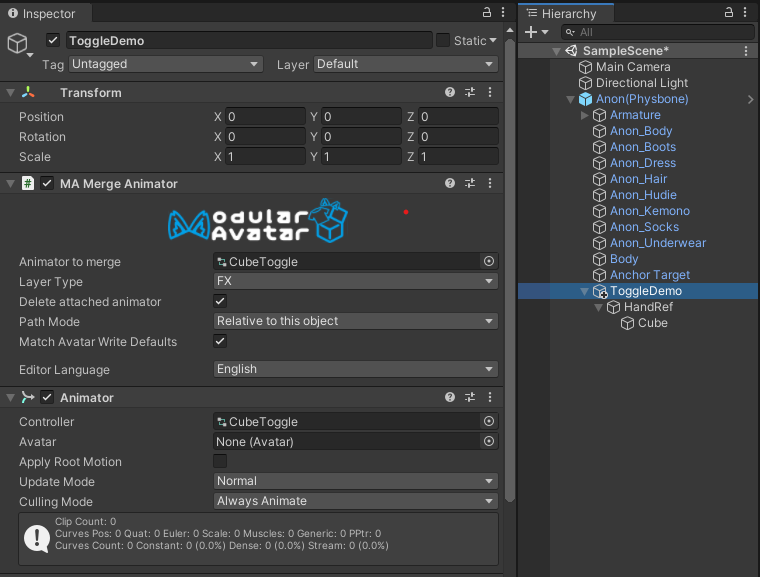
Go back to your top-level GameObject, and add a MA Merge Animator component.
Set the Animator to merge to your new animator controller. Check the delete attached animator
and match avatar write defaults boxes.
Then, also add an Animator component, and point it to your new animator controller as well.
Merge Animator doesn't need to be at the top level GameObject. Feel free to put it further
down the hierarchy if you prefer. Just make sure that MA Parameters (which we'll discuss further down)
is on either the same object, or a parent of all your Merge Animators and Menu Installers!
Adding an Animator here is also optional; we're just using it so that Unity allows us to
record animations. By checking the delete attached animator box, Modular Avatar will delete the
Animator component at build time.
Step 4: Recording our animations
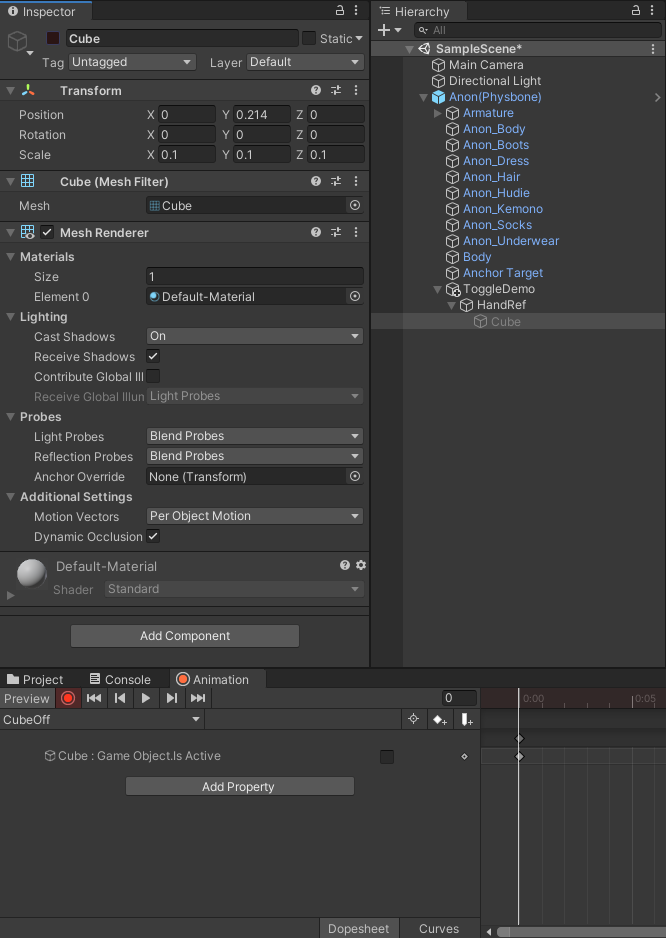
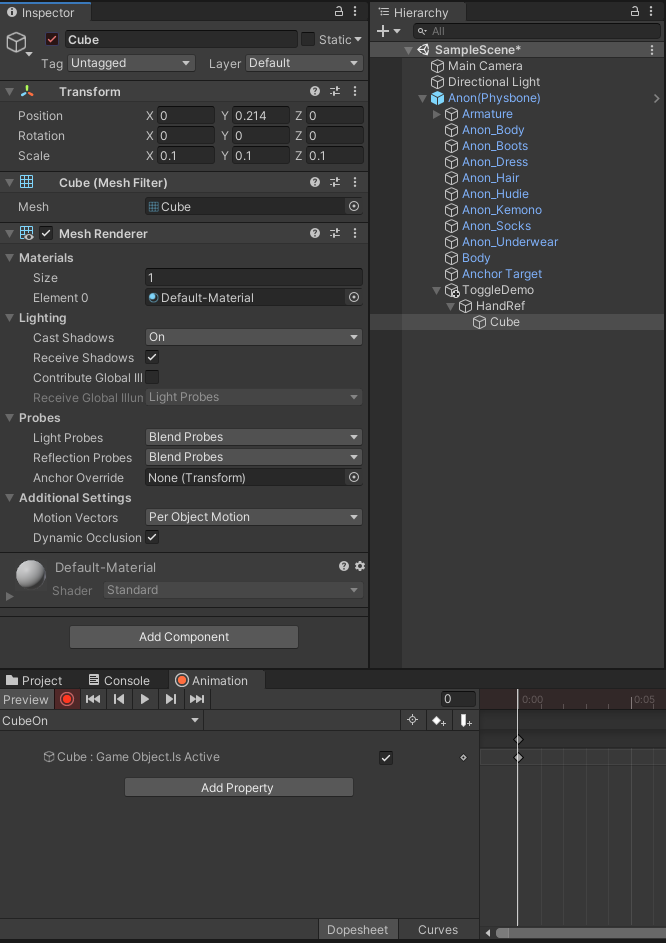
Go to the unity "Animation" tab. If you don't have it, press Ctrl-6 to open it.
You should see CubeOff and CubeOn (only) in the list of animations; if not, make sure that your ToggleDemo object
is selected.
With CubeOff selected, click the red record button, then turn the Cube GameObject off.
Then, with CubeOn selected, click the red record button, and turn the Cube GameObject off, then on again.
Step 5: Setting up synced parameters
Almost there! Next, we'll set up our synced parameters, so they are automatically added.
Head back to our ToggleDemo object, and add a MA Parameters component. Click the Show Prefab Developer Options
checkbox.
You'll see that our Cube parameter is automatically added. Set Sync Mode to Bool and check the Internal box.
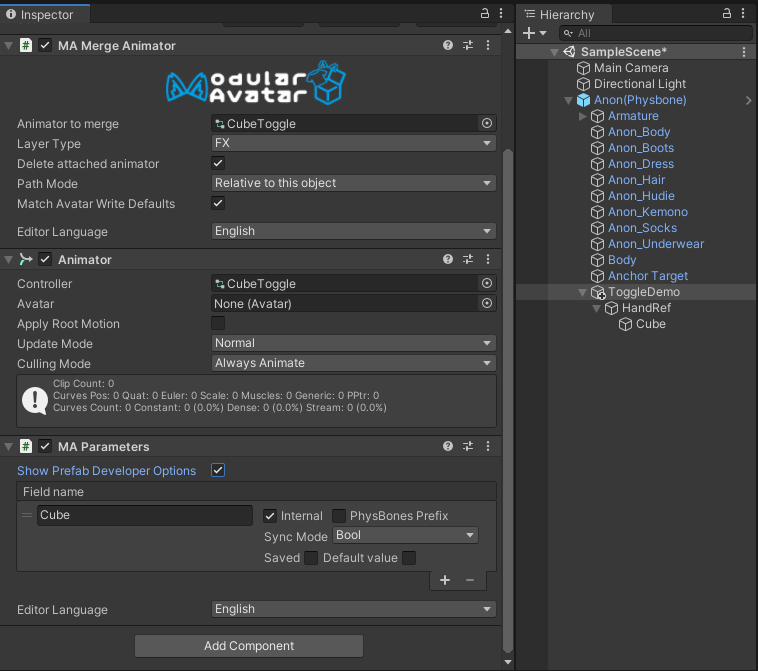
If you set the internal checkbox, modular avatar will ensure that your Cube parameter doesn't interfere with anything
else on the avatar using the same parameter name.
If you leave it unchecked, the end-user will be able to rename the parameter if they want, but can also choose to have
multiple prefabs use the same parameter.
Setup 6: Setting up the menu
Finally, we'll set up the Av3 menu entry. Create an Expressions Menu asset:
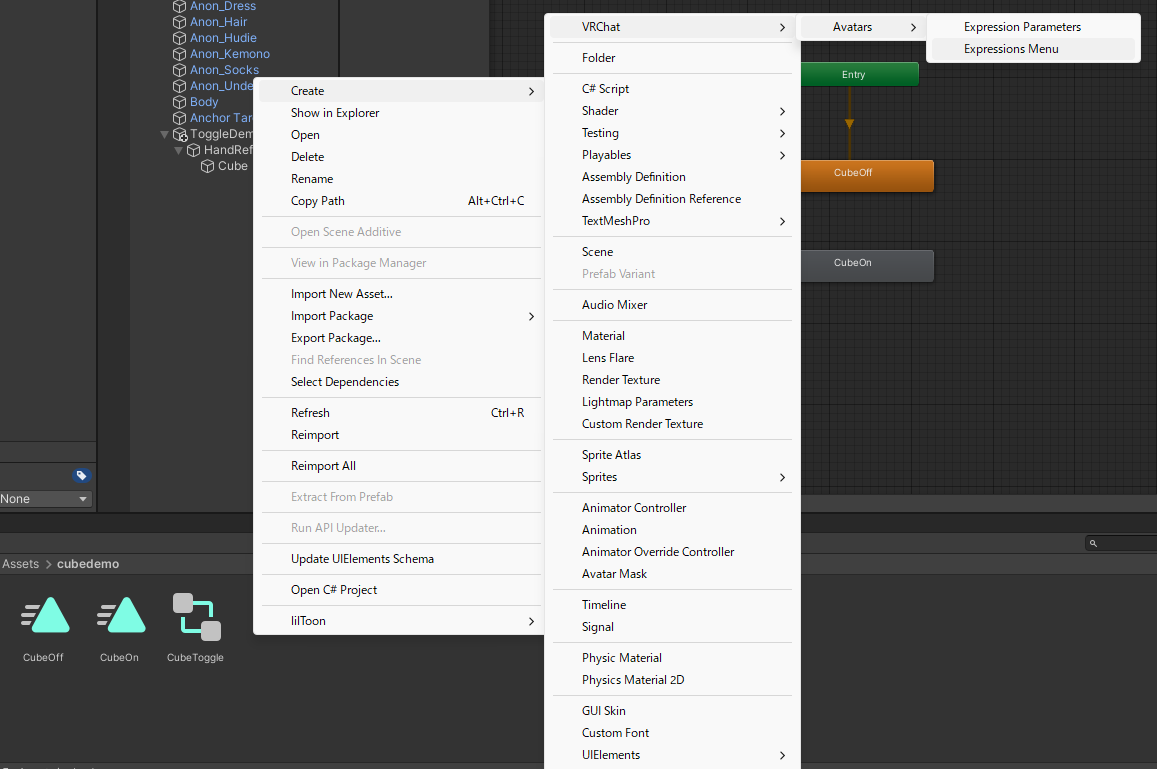
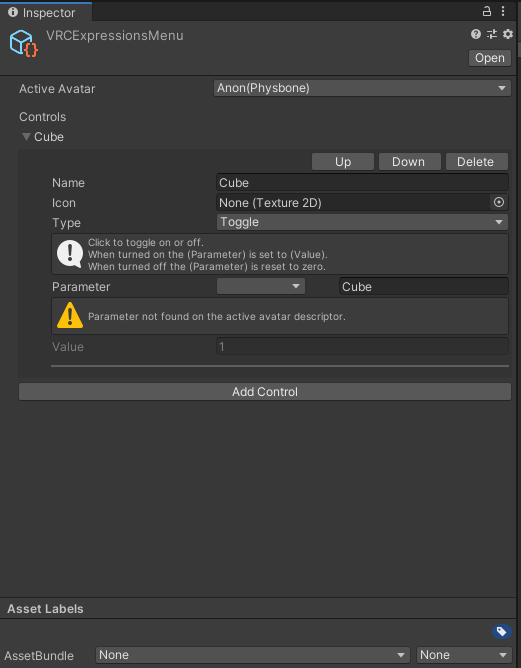
Add one control to it; set the name to Cube, type to Toggle, and for the parameter field, enter Cube in the text box.
Note that because we haven't actually built the avatar yet, the parameter isn't in the dropdown yet. That's okay!
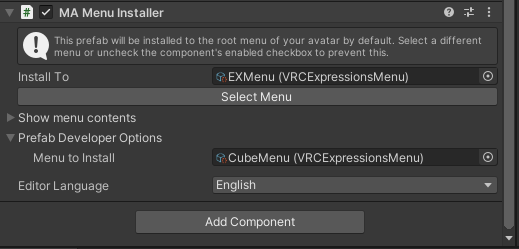
Now add a MA Menu Installer component to your ToggleDemo object. Open up the Prefab Developer Options section, and
put your expressions menu asset there.
At this point, we're done! If you build and upload the avatar, you should have a menu item which will summon a cube to your right hand.
Finishing up: Prefab conversion and component ordering
Let's get our cube ready to distribute. First, the components our end-users might want to mess with are primarily the Menu Installer and (if you disabled the Internal checkbox) possibly MA parameters. We might want to drag those up to the top of our inspector.
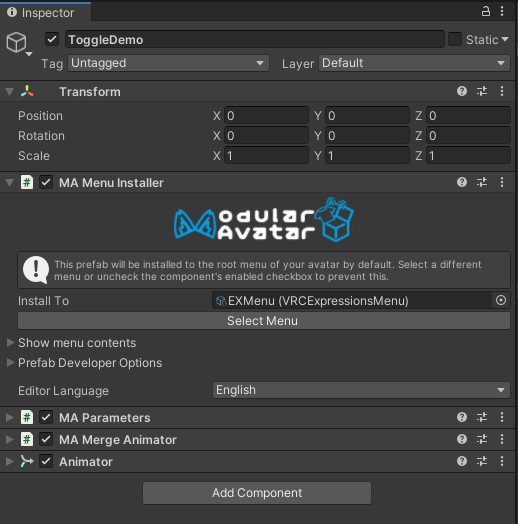
Once you're happy with things, drag ToggleDemo into your project pane to create a prefab. Now you can drop that onto any other avatar, and have an instant cube!